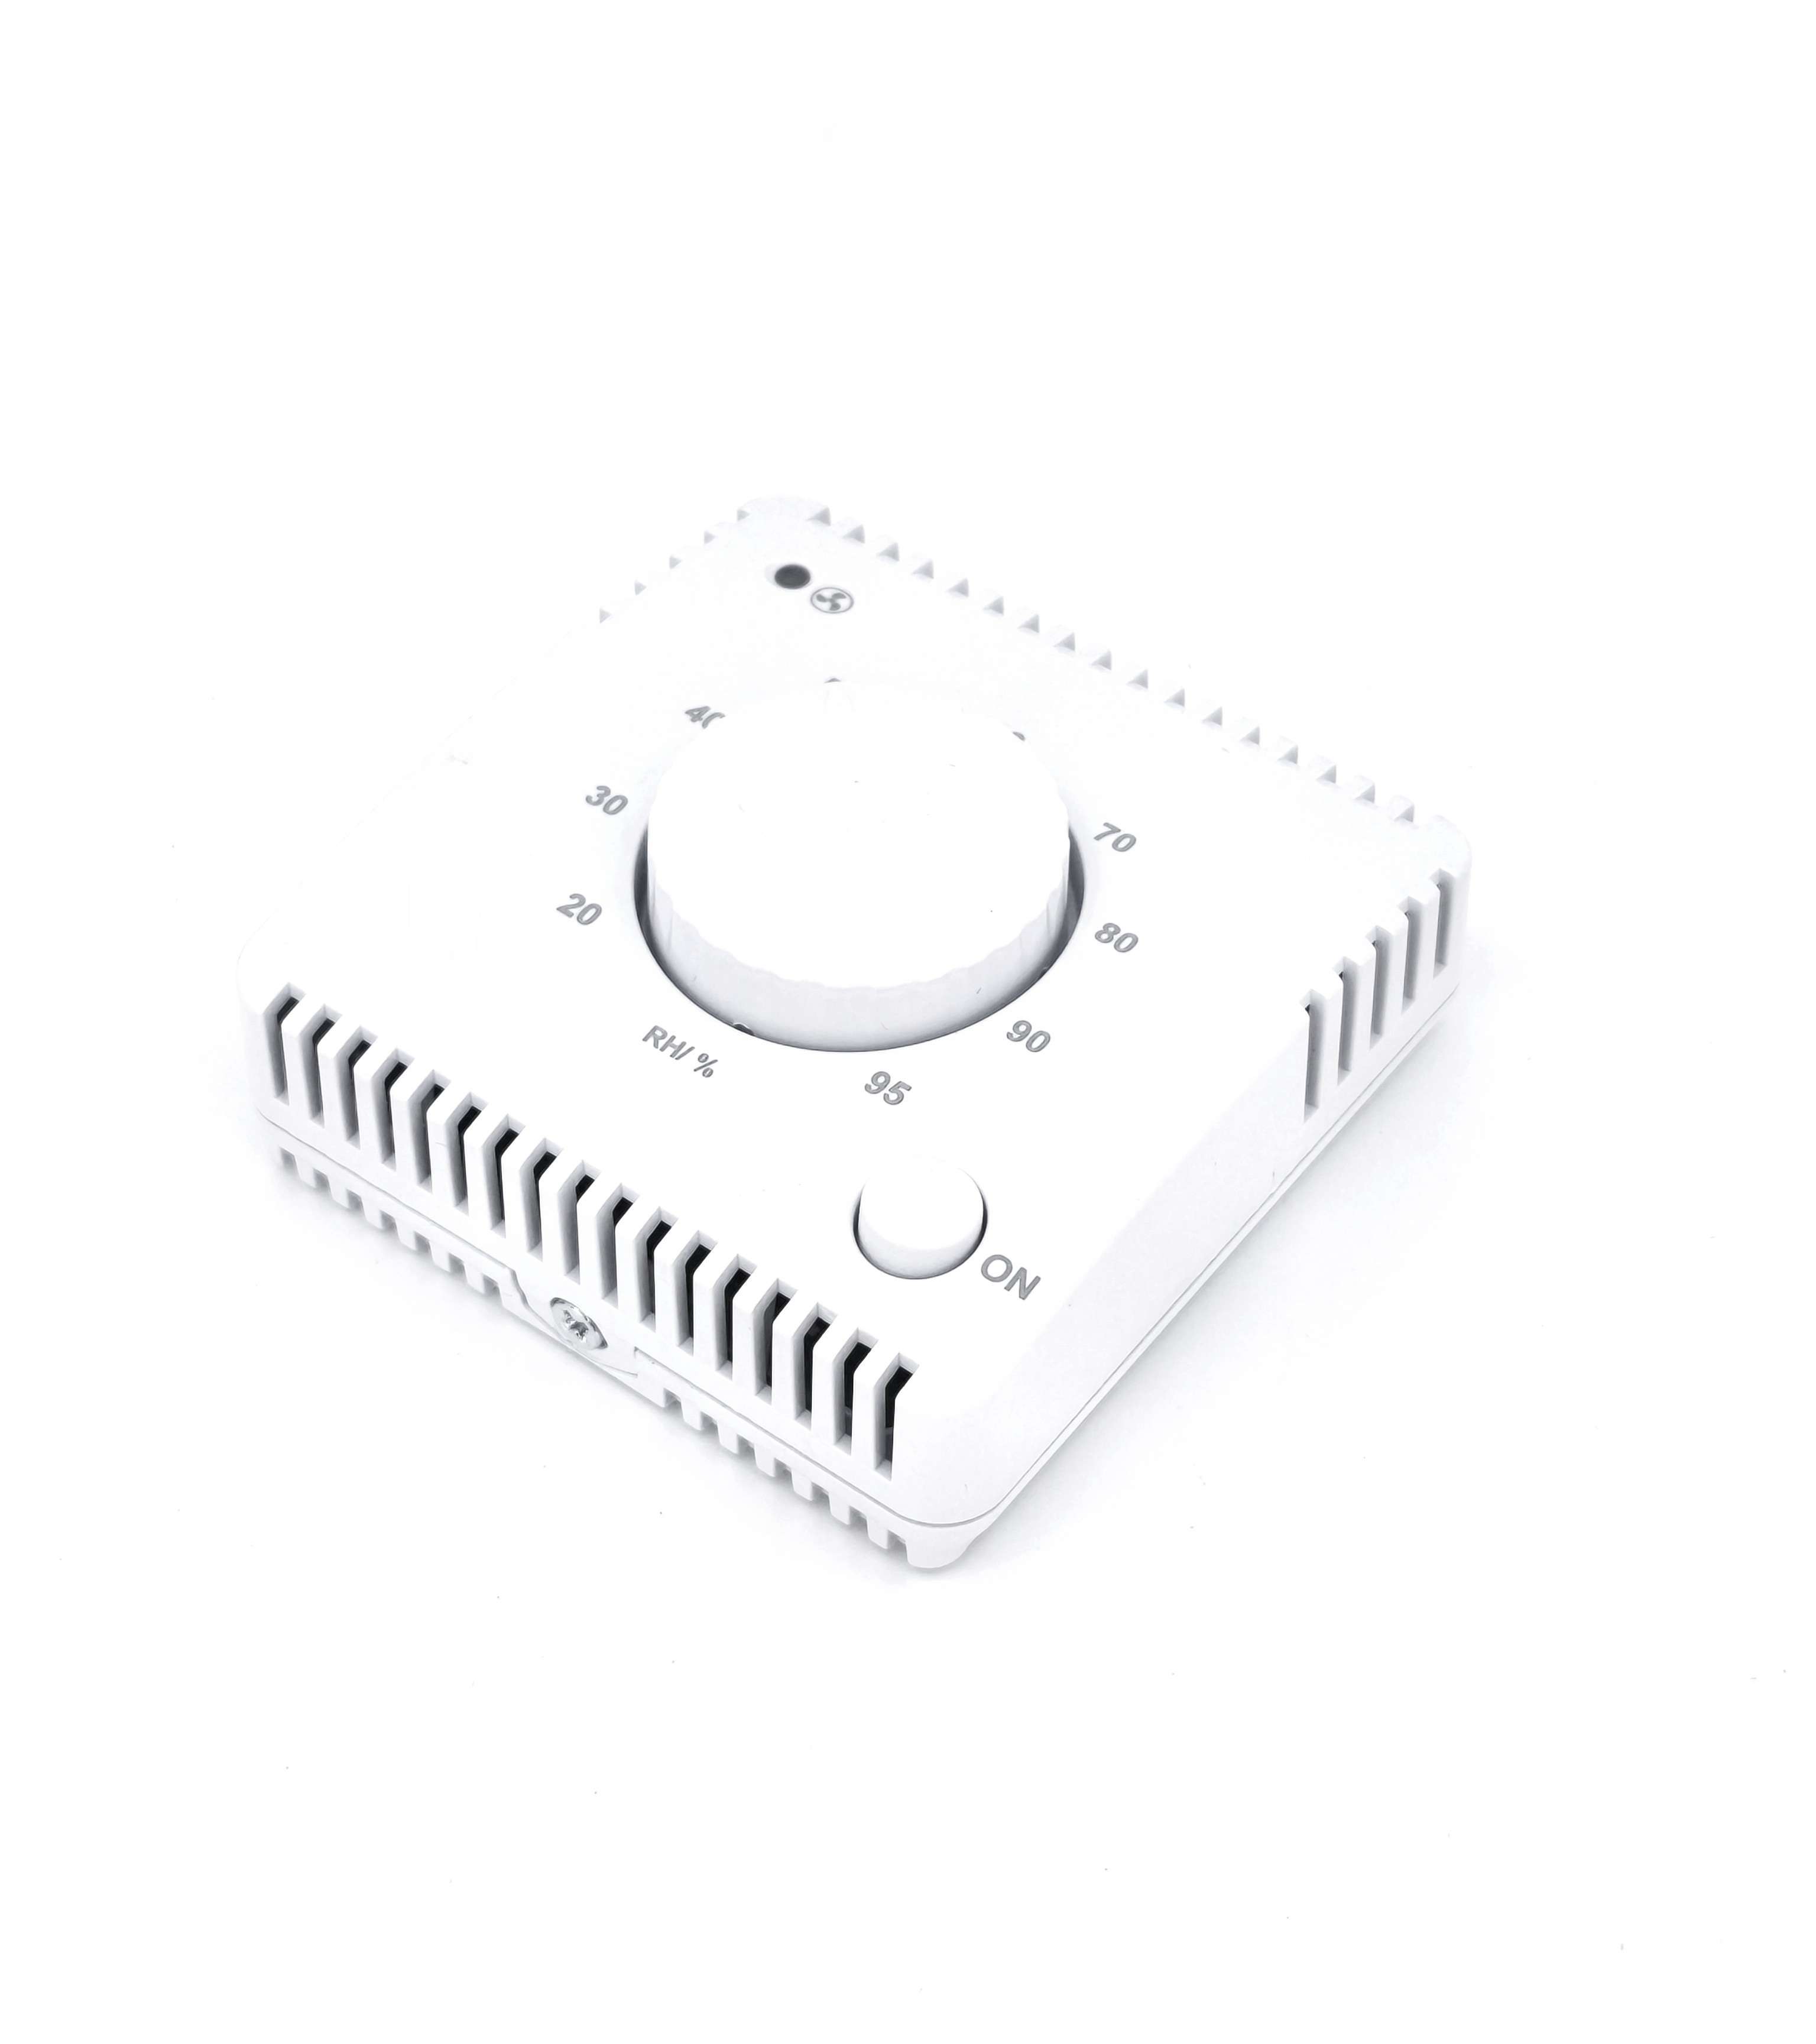
Indoor Humidity Control
This indoor sensor is designed for direct cooperation with the Smarwi system and enables monitoring of the relative humidity in a room. When the humidity exceeds the set value, the sensor sends a signal to Smarwi, which opens the window to improve ventilation.
The SN130 is a practical solution for areas prone to condensation and mold growth – for example, in bathrooms, kitchens, toilets, or laundry rooms.
The sensor also includes a manual load activation button – a single press activates the output for approximately 10 ±1 minutes. This function can be used to start ventilation immediately without waiting for automatic operation.
What Is the Optimal Relative Humidity?
Bedrooms and living rooms: 40–60%. Bathrooms: humidity may temporarily be higher, but it’s important to ventilate quickly. Storage rooms, pantries: around 50%. Below 40%: air is too dry – it dries out mucous membranes and skin and irritates the respiratory tract. Above 60–65%: condensation may occur on walls, leading to mold growth.
Safe and Simple Power Supply
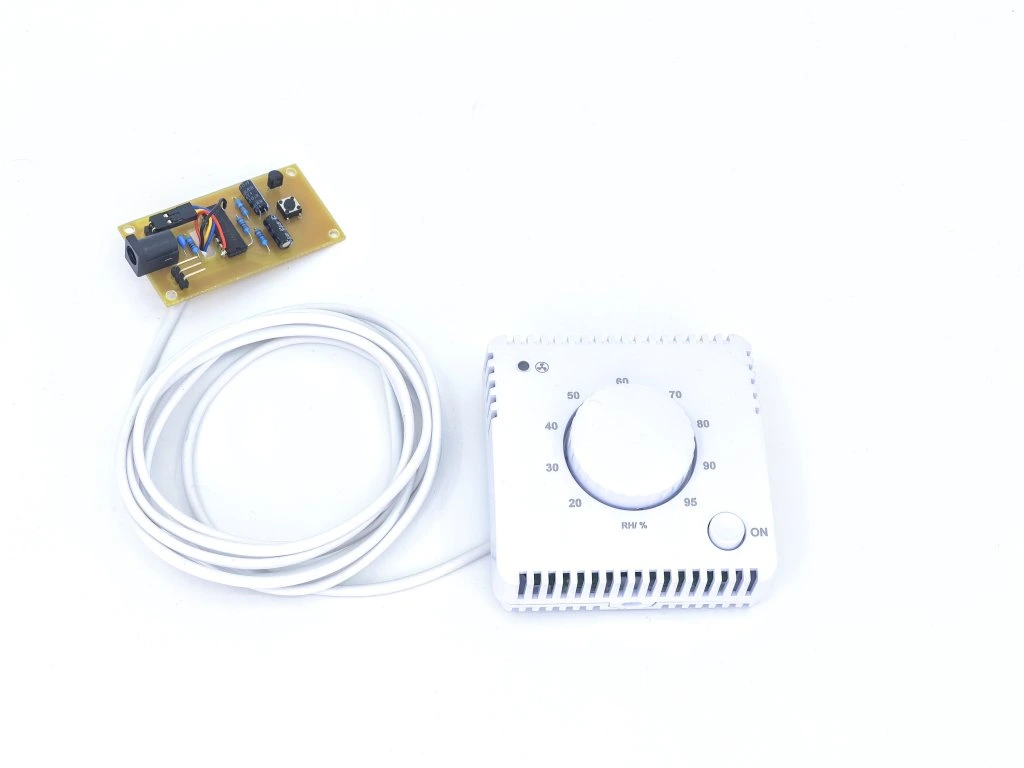
Our sensor can be powered directly from the Smarwi 12 V DC power source.
- No separate socket required
- No handling of 230 V mains voltage
- Installation can be done easily without professional qualification
Both power and signal connections are provided through a single shared cable.
What Does RH Stand For?
Relative Humidity (abbreviated RH) indicates how much moisture is present in the air. When the relative humidity reaches 100%, the air can no longer hold additional water, which then begins to condense – for example, on windows. At lower levels, the air is drier.
Advantages of the Integrated Solution
- Safe low-voltage connection
- Humidity measurement with adjustable activation threshold
- Direct connection with the Smarwi control button
- Manual activation of ventilation by pressing the button on the sensor
- Discreet design suitable for indoor spaces
How Many Sensors Can Be Connected?
Only one sensor can be connected to the Smarwi system at a time. Choose the one most suitable for your home. Combining multiple sensors simultaneously is not possible.
You Can Easily Connect the Sensor Yourself in 5 Steps
Disconnect the button’s power connector. Remove the magnetic cover from the back of the device. Unscrew the four corner screws (cross screwdriver PZ1). Remove the back cover of the button.
Remove the electronic board with the button and the connected cable. Carefully disconnect the rectangular cable from the connector.
Feed the sensor cable through the opening in the board toward the connector. Connect the sensor connector to the electronic board. The black wire must face away from the power connector! Insert the board back into the housing so that it locks into its original position.
Reattach the back cover of the button. Screw in the four screws. Replace the magnetic cover. Connect the power connector.
Set the desired parameters on the sensor (e.g., activation type). After connection and system initialization, your Smarwi will function as before, with the added ability to be controlled by the connected sensor.
Technical Specifications
- Power Supply: 12 V DC
- Power Consumption: <1 W
- Hysteresis: 5 % RH
- Humidity Setting Range: 20 – 95 % RH
- Operating Temperature: 0 – 40 °C
- Operating Humidity: 0 – 95 % RH, non-condensing


")